![]()
![]()
![]()
![]()
![]()
![]()
|
|
IntroductionBefore we start, let me say that the text of this presentation has been posted at one of my Web sites, and your handout provides the Web address for that along with the URLs for a lot of other useful sites. So feel free to take notes if you like, but if you don’t want to, you can get the information later online. Also, let me make clear that I’m going to be touching on a lot of issues rather briefly because there’s no way that I can tell you everything you need to know about these subjects in the time we have. On the handout I have listed a lot of articles that tell more about the topics I’ll be discussing today, and I encourage you to look at these articles if you want to learn more. Let me also say that, despite any evidence to the contrary, I am not a computer geek. If I were a computer geek, do you think I would be using old-fashioned transparencies instead of a slick PowerPoint presentation? But I have no idea how computers work, I don’t own a laptop, and I have never used PowerPoint, and having seen dozens of PowerPoint presentations go bad in the hands of presenters who didn’t know what they were doing, I wasn’t about to risk it. What I am is someone who loves the printed word, and I want to assure you that you don’t have to be a computer geek to master your word processor and make it do what you want. You just have to be curious and willing to take some chances and try some new things. How many of you here use Microsoft Word? [show of hands] Okay, some of what I am going to say today is specific to Word, but a lot of it is applicable to any word processing program—WordPerfect, Lotus Word Pro, the Works word processor—even WordPad—so I hope everyone can benefit. And, although I have experience only with Word for Windows, I believe that most of what I will tell you is also applicable to MacWord (given the appropriate translation of keyboard shortcuts). Finally, some of what I’ll be saying is really basic, but there may be some in this room who don’t know it. And some of the topics I’ll be touching on may be more advanced than some of you want to think about. But I hope that everyone will take home a few useful new ideas. It’s not surprising that the majority of you are using Word, and if you’re not now, you may be eventually. If you buy a new computer today, you will very likely find that it comes with some version of Word installed, often as part of Works Suite. You may be given the option of including Office 2003 at minimal extra cost. If you are serious about writing for publication, Word is going to be your first choice because it is the application currently used by most editors and publishers. This hasn’t always been true: at one time WordPerfect was the favorite, and I have prepared plenty of manuscripts in WordPerfect in my day. But now, if you want to give your manuscript the best shot at being read, you’ll present it in Word format. And if you’re using another word processor, chances are that your document will sooner or later be converted to Word format. This is something you need to keep in mind in preparing your manuscript: sooner or later you’re going to be asked for it in electronic format. So what is important is not just how it looks on paper but how it is formatted on the computer. You will win plenty of brownie points with your publisher (and stand a much better chance of having your manuscript accepted) if you submit something that is easier for a typesetter to convert to a printed book. This is a matter of sheer economics: more work costs the publisher more money. So the tips and techniques I’m going to talk about today have one or both of two purposes: to make it easier for you to use Word and to make it easier for a publisher to use your manuscript. Word vs. a TypewriterMost of you here probably started writing long before you learned to use a computer, and doubtless many of you started writing before personal computers were invented. I would guess that everyone here probably started writing by hand. But I’ll bet a lot of you also used a typewriter before you used a computer. And the first thing you have to learn about a word processor is that it is not a typewriter. This can be both a good thing and a bad thing. The good part is that you don’t have to retype endless drafts: you can edit and revise a single document endlessly. That’s sometimes the bad part, too, as it becomes very hard to stop editing and call something finished! But the worst part is the way the computer often seems to be working at cross purposes to you, and you can’t seem to get the manual control over it that you had over a typewriter. Most writers willingly accept some of the kinds of help that word processors offer. We love being able to go back and delete or insert text or replace it with different text. We like having instant spelling assistance (except when it keeps telling us words are misspelled when we know they aren’t). We like having the freedom to just type text without worrying about formatting, which we know we can go back and take care of later. What we don’t like is the way that Word seems to have a mind of its own. Its obtrusive “helpfulness” (which Microsoft calls “IntelliSense”) can drive us to distraction. Sometimes all we want is for Word to get out of the way and let us write.
I’d be willing to bet that every one of you who uses Word
has bumped his head on it at least once, but when you’re trying to get a job
done, you can’t always take time to figure out how to do it better and more
efficiently. So one of the things I’m going to talk about today is how to
customize Word to provide the help you want and otherwise stay out of
your way. The Word Object ModelMany of you may have used WordPerfect before you used Word. If so, you probably depended heavily on Reveal Codes, the feature that lets you see the formatting codes that WordPerfect inserts into the text stream. Many migrants from WordPerfect to Word ask for the equivalent in Word, but there is no exact equivalent and can’t be because Word is organized entirely differently from WordPerfect. Programmers say that it has a different “object model.” The object model of WordPerfect is a text stream with codes (which is very similar to HTML, the language used for creating Web pages, and to LaTeX and similar languages used in publishing), but Word is like a set of Chinese boxes—containers nested within other containers. A document is a container, into which you can insert text, graphics, complete files created by other applications, and so on. But the basic unit of formatting in Word is a paragraph. What Word means by a paragraph and what you mean by a paragraph can be different things, but it is to your advantage to make the definitions converge as much as possible. What Word means by a paragraph is a block of text that ends in a paragraph break. You create one of these every time you press Enter. And that brings up the title of my presentation, the “lonely pilcrow.” First of all, who knows what a pilcrow is? [show of hands] How many of you knew what a pilcrow was before you registered for this workshop? [fewer hands] Okay, who can tell me what a pilcrow is? [A paragraph mark] Right, it’s a paragraph mark (¶). In Word a pilcrow or paragraph mark is very important, but many people become very alarmed the first time they see one. In the Word forums where I answer questions, we’re constantly getting questions about “strange-looking marks” that have suddenly appeared in the user’s document. How many of you have seen a page that looks like this?
Figure 1. Text with nonprinting characters displayed This is a Word document with “formatting marks” or “nonprinting characters” displayed. To get this view of a document, you can press Ctrl+* (Ctrl+Shift+8 on U.S. keyboards) or click on the Show/Hide ¶ button or check the box for All under “Formatting marks” or “Nonprinting characters” on the View tab of Tools | Options.
Figure 2. The Show/Hide ¶ button and the View tab of the Options dialog Even if you don’t want to see these marks all the time, being able to see them when you need to helps you troubleshoot problems in the document, such as extra pages and unexplained space. But what’s wrong with this document? [Paragraph marks at the end of every line.] Right, there’s a paragraph mark at the end of every line. Worse still, there are paragraph marks between every two lines. The author of this document may have known how to use word wrap in Word, but apparently he didn’t know how to create double spacing, so he pressed Enter twice at the end of every line. That’s a lot of work—even more work than you would have on an old-fashioned typewriter set for double spacing. I suspect that most of you know how to double-space and how to let Word wrap your text at the end of lines, but you may still have extra paragraphs in your documents, which you’ve used to create “blank lines.” There are several reasons why this is a bad idea, but one of the most basic is that it’s wasteful. I’ve said that a paragraph is a container. The paragraph mark contains information about the formatting of that paragraph: this includes paragraph properties such as tab settings, indents, Space Before or After, and alignment (left, center, right, or justified) as well as font properties, language, and so on. Every paragraph mark in the document contains all this data; if a paragraph is empty, then the paragraph mark is very much wasted. It’s like a light or a fan turned on in a room you’re not in; it’s costing you money (or, in the case of a Word document, disk space) without any benefit to you. So you don’t want empty paragraphs, but you also don’t want to break a logical paragraph (that is, what you consider a paragraph) into two Word paragraphs. You can often avoid this by using a line break instead of a paragraph break. This is a foreign concept if you have used WordPerfect, which doesn’t feel the same way Word does about paragraphs and doesn’t have any such thing as a line break. In Word, however, when you want to move to the next line without starting a new paragraph, you can press Shift+Enter. Okay, the concepts we’ve got so far are that paragraphs are important and shouldn’t be wasted and that you can get a better idea of what’s going on in your document by displaying nonprinting characters. Getting ReadyThe next area we’ll look at is setting up Word to allow you to work most efficiently. You could view this as being analogous to “sharpening pencils,” that is, getting your desk and materials arranged efficiently so that you don’t have to keep jumping up and getting things you need. One of Word’s greatest strengths is the extent to which you can customize it to work the way you want to work. Every one of Word’s built-in toolbars can be customized—that is, you can add or remove buttons to suit you—and you can even create custom toolbars for specific documents or templates. If you have a recent version of Word (Word 2000 or later), the first thing you want to do is give yourself a fighting chance to find the commands you need by disabling “adaptive menus.” The concept of “adaptive menus” is one of those brilliant Microsoft innovations, supposedly based on usability studies, that most users really hate. I’m sure most of you know what happens if you decide to reorganize your kitchen or office to be more efficient. You think you’ll arrange things more “logically.” But then you can’t find anything because nothing is where you are used to looking for it. That’s why the first thing you want to do in Word is open the Tools | Customize dialog, select the Options tab, and change the settings so that you always see the same thing. In Word 2000, you need to clear the check boxes for “Menus show recently used items first” and “Standard and Formatting toolbars share one row.” In Word 2002 and 2003, you need to check the boxes for “Always show full menus” and “Show Standard and Formatting toolbars on two rows.”
Figure 3. The Options tab of the Customize dialog On the Commands tab of this dialog (see Figure 4) you can select from all of Word’s built-in commands and add any one of them to a toolbar or menu. You’ll note that some of them have button icons and others don’t. You can find button faces and add them or create your own. Your handout lists online articles that explain how to do this.
Figure 4. The Commands tab of the Customize dialog Another important dialog is the AutoFormat As You Type tab of Tools | AutoCorrect Options. The options here vary a little between versions; the one shown here is for Word 2003. In general, you’ll want to clear the check boxes for pretty much everything that’s labeled “automatic.” Some of the options are really helpful—“‘Straight quotes’ with ‘Smart Quotes,’” for example—but you need to decide on a case-by-case basis which ones you want enabled. For example, I have disabled automatic fractions because when I was membership chairman of the Friends of the Library, I had a Word table in which I kept a record of membership renewals. When I typed the date January 2 as 1/2, I didn’t want it changed into a fraction. So I have assigned keyboard shortcuts for the common fractions and use those instead. The most important option to disable here is “Define styles based on your formatting.” What this really means is “Apply styles based on Word’s interpretation of your formatting.” If you leave it enabled, you’ll likely find that if you type a single line of text that doesn’t end with a period and format it as bold, Word will decide that it is meant to be a heading and randomly apply one of the heading styles to it. You want to be in control of what styles you use; you don’t want to let Word make decisions for you.
Figure 5. The AutoFormat As You Type tab of the AutoCorrect dialog Yet a third important dialog is the Tools | Options dialog, which we saw before when we looked at the View tab. There are a variety of important settings here that control how you view Word and how it behaves in certain circumstances. We don’t have time to talk about all these options, but I’ll just show you the ones on the Edit tab as an example. You can experiment with the effects of these settings to see how you prefer to have them set, but note that they can all have a major impact on your ability to handle text. A little later I’ll discuss some of the unexpected problems that can arise when you don’t have these set just right.
Figure 6. The Edit tab of the Options dialog New concepts: Use the Customize, AutoFormat As You Type, and Options dialogs to fine-tune Word to work the way you want. WritingAll right. You’ve set up Word to make its riches available to you at your request and to interfere as little as possible with your work. So now it’s time to start writing. So you click on the New button on the Standard toolbar to get a new blank document. (Actually, this is not the best possible idea, but we’ll get to that later.) Starting at the top of your blank document, you start typing. Your text is in Normal style, which in Word 2000 or above means that it is 12-point Times New Roman, left-aligned, single-spaced, and with the language set to U.S. English. This is a manuscript, so you need it to be double-spaced. You could go to the Format | Paragraph dialog and change to double spacing, but this is not necessary: there’s a built-in keyboard shortcut for double spacing: Ctrl+2. To return to single spacing, you can use Ctrl+1. Ctrl+5 will give you one-and-a-half-line spacing. As you proceed through your manuscript, you may want to make some of the text bold or italic. There are keyboard shortcuts for those as well: Ctrl+B and Ctrl+I. You can use them to apply the format to selected text, or you can use them as toggles, once to turn the format on and again to turn it off. Or you can use Ctrl+Spacebar to remove all directly applied font formatting. Ctrl+Q will remove direct paragraph formatting; if you press this in a Normal paragraph that is double-spaced, it will become single-spaced. There are also keyboard shortcuts for paragraph alignment: Ctrl+L for left, Ctrl+E for center, Ctrl+R for right, and Ctrl+J for justified. I’ve said that you shouldn’t press Enter twice to get a blank line between paragraphs. You can use the shortcut Ctrl+0 to add 12 points of Space Before to a paragraph. This is the equivalent of a blank line. The reason I mention all these shortcuts, which are listed on your handout, is that I prefer to keep my hands on the keyboard when I’m composing. I usually write in two stages: I write with the keyboard and then edit with the mouse. So even though there are toolbar buttons for a lot of these same functions in Word, it is much more efficient to use keyboard shortcuts during the composition phase. If you are using a recent version of Word, especially if you have certain add-ins installed, you may notice something very disturbing when you use one of these keyboard shortcuts. When you select a paragraph and apply some kind of formatting (bold, say, or center alignment), every paragraph in your document takes on this formatting. This happens because the style you are using is set to update automatically: that is, changes that you make to any paragraph in that style are made to the style itself and therefore affect all paragraphs in that style (and if that style is Normal, and it’s the only one you've used in your document, then the changes will affect the entire document). The cause of this problem and its cure are described in this article. Perhaps the most important keyboard shortcut of all is Ctrl+Z (Undo). Whenever Word does something you don’t want or didn’t expect—anything from an AutoCorrection to disappearing your entire document—immediately press Ctrl+Z to Undo it. You can also click the Undo button on the Standard toolbar. Think of this as your Panic Button. If your document becomes hopelessly messed up so that you don’t know how to fix it, click the arrow beside the Undo button to display the Undo list. Scroll down to find the action where the problem probably began and click on it to Undo everything back to that point. Very few actions in Word are irreversible, but saving is one of the ones that can’t be undone. Still, even if you have saved your document when it is messed up, you’re still okay provided you don’t panic and close the document. As long as it is still open you can use Undo to get back to where you were. Even if you do save and close, you may still be able to retrieve a good version of the document if you have told Word to automatically save a backup copy. For more information on this, see "How can I make Word save or back up my document automatically?" Now, continuing with your document creation, you probably want the first line of each paragraph indented, so you press Tab to indent it to the first of the built-in tab stops, which are at half-inch intervals. You have to do this at the beginning of every paragraph. So far you haven’t done much more than you could accomplish with an electronic typewriter. But Word is capable of so much more! Let’s look at a few ways you can make Word work for you. The RulerLet’s start with that first-line indent. If you want every paragraph indented half an inch, why should you have to press Tab at the beginning of every paragraph? You don’t have to! Instead, use Word’s ruler (or the Format | Paragraph dialog) to set a first-line indent. You just drag the First Line Indent marker to the desired position—which doesn’t have to be half an inch.
Figure 7. The ruler showing the First Line Indent marker Sometimes you need the entire paragraph to be indented. For example, if you are typing poetry or a long quotation, you may want to indent the paragraph from both left and right.
Figure 8. The ruler showing Left Indent and Right Indent markers You can do this by dragging the Left Indent and Right Indent markers. If you want every line except the first to be indented, as in a bibliography, you can set a Hanging Indent.
Figure 9. The ruler showing the Hanging Indent marker As you can see from your handout, there are also keyboard shortcuts to set left and hanging indents: Ctrl+M and Ctrl+T. If you do need to use tabs to position text on a line, don’t use the built-in tab stops, which are rarely in the right place and will almost always require more than one tab character. Instead, set specific tab stops by clicking on the ruler. Word lets you set left-aligned, right-aligned, centered, and decimal-aligned tabs. If you have trouble doing this using the ruler, you can also use the Format | Tabs dialog. AutoText and AutoCorrectIf you have boilerplate text that you need to insert frequently, you can use Word’s AutoText and AutoCorrect features. You may be familiar with AutoCorrect only as a way to correct your common spelling mistakes, but you can also use it to insert any text that is a pain to type. For example, in one of Suzanne Hudson’s manuscripts, there was a character named “John T.” Names in general always slow down my typing rhythm because they require shifting, and this one also required a nonbreaking space (Ctrl+Shift+Space) between “John” and “T.” and a period after the T. Typing that got old quickly, so I defined an AutoCorrect entry so that every time I typed “jt,” Word spat out “John T.” In other documents, I’ve created two- or three-letter shortcuts for phrases such as “Dallas/Fort Worth” and “Florida Power & Light.” Although AutoCorrect entries can be quite long, when you have really big chunks of text to insert (not to mention tables, graphics, or pretty much anything else) AutoText is more appropriate. If you give your AutoText entry a unique name at least four characters long and have AutoComplete enabled, you will get an AutoComplete tip when you have typed those four characters, and you can just press Enter or Tab to insert the entry. You’re probably familiar with Word’s built-in AutoText entries, which include such dubiously useful phrases as “Yours truly.” You can probably think of better uses for this feature. Styles and TemplatesEverything I’ve talked about so far will make typing easier for you, but I haven’t even touched on the biggest timesaver of all: styles. Most Word users are very resistant to learning anything about styles or templates. Often they will say, “I never use styles,” or “I don’t use a template.” But you can’t create a document in Word without using styles and templates. It’s just that, by default, the style you use is Normal style, and when you create a new blank document, it is based on the Normal template. So let’s talk about what styles and templates are. A paragraph style is a definition of paragraph formatting. We said that the Normal style, by default, is single-spaced and left-aligned and uses 12-point Times New Roman font and U.S. English language. It has no indents or tabs or Space Before or After. You’ve seen that you can change everything about that definition. If you want to change all those things at once, you can apply a different style. Needless to say, this is much quicker than applying all the various formats individually. Why do you need styles? Because you want to make your manuscripts look pretty! You know you do. I’ve seen this in the documents I get from you. You aren’t content with a manuscript that looks like it was produced on a typewriter. You want to take advantage of the formatting options that a word processor offers you to make your manuscript look more like a finished book. So perhaps you decide you want your chapter titles centered and in larger, boldface type, with extra space between the title and the first paragraph of the chapter (which of course you add with Space After, not by pressing Enter multiple times!). You can do all this manually, of course, but even if you use keyboard shortcuts, you’re still going to be applying each format as a single step. And if you want to keep your formatting consistent, you have to remember how you did it the time before. And if you change your mind and decide you want the title to be in 14-point Arial instead of 16-point Times New Roman, you have to go back and reformat every paragraph individually. But if you have instead defined a Chapter Title style, then you can apply all the formatting in one stroke, it will be consistent for every chapter title, and if you decide you want to change anything about the formatting, you only have to modify the Chapter Title style, and all the Chapter Title paragraphs will be updated automatically. To modify an existing style or create a new one in Word 2000 or earlier, go to Format | Style and either click New… or select a style and click Modify… In Word 2002 or 2003, open the Styles and Formatting task pane and either click New Style or select a style, click the arrow beside it, and choose Modify.
Figure 10. The Styles and Formatting task pane Another way that styles can save you time is that, for every style, you can define which style you want to follow it. So you can define a Chapter Number style and specify the Chapter Title style as the “Style for following paragraph.” The following style for Chapter Title can be Body Text First Indent. So when you want to start a new chapter, you just select your Chapter Number style (which can be autonumbered and set to start a new page), and everything else flows from there.
Figure 11. The Modify Style dialog showing “Style for following paragraph” I’ve said that you can customize just about everything in Word, and sure enough, you can customize Normal style and the Normal template. But you don’t want to do this. If what you mostly write is manuscripts, which have to be double-spaced, you may think that it would be easier if you customized Normal style to be double-spaced. But this is not a good idea because almost every other style in Word is based, directly or indirectly, on Normal style. If you make Normal double-spaced, all the rest will be double-spaced. What will you do when you want to type a single-spaced letter? And although you can customize the Normal template in many ways (and in fact most of the customizations you make to toolbars and menus and AutoText and such are stored in the Normal template), there are very few changes that are really wise. If you have an older version of Word in which the default font is 10-point Times New Roman, you may want to change it to 12. And if you want to reduce the side margins from 1¼" to 1", that won’t hurt. If you insist on making something double-spaced, modify the Body Text style instead. But most other changes should be made in a document template. A template is a collection of styles and formatting. The Normal template is the template on which new blank documents are based, but Word comes with a variety of other templates, and you can also create your own. These can use different paper sizes, have different margins, have defined headers and footers, and use different fonts and paragraph formatting. For example, you can create a template for your personal letterhead, and it will look very different from the template you use to create your manuscripts. On my Web site, I’ve posted a sample manuscript template. This is similar to the one I furnished to Sonny Brewer for his manuscripts. It has built-in features that will help you type your manuscript with the least amount of work. One caveat: Don’t get too carried away with formatting. When you’re creating a manuscript, it is not your job to make it look like a book, and some embellishments (such as drop caps and fancy fonts) will just make the publisher’s job harder in the long run. So keep it stylish but simple. EditingWhen you have finished a typing session and go back to edit your text, you may occasionally experience difficulty in deleting or changing text. Here are some causes of common problems in this area: You can’t delete selected text by pressing Backspace, or you can’t type over selected text. The reason is that you don’t have “Typing replaces selection” checked on the Edit tab of Tools | Options. (Word considers backspacing “typing.”) You can’t delete selected text by pressing Delete. You get a prompt in the status bar that says “Delete block? Y/N,” and you have to type Y (for yes) to delete it. This is a result of having either or both of the WordPerfect options checked on the General tab of Tools | Options. Some migrants from WordPerfect think that enabling “Help for WordPerfect users” or “Navigation keys for WordPerfect users” will be helpful. It’s not; it causes nothing but trouble. When you try to insert text, it types over existing text. You have accidentally toggled from Insert to Overtype mode, usually by hitting the Insert key when you were aiming for Backspace or Delete. Press Insert again, or double-click on OVR on the status bar, or clear the check box for “Overtype mode” on the Edit tab of Tools | Options. When you delete or type over text, it becomes colored and struck through. Inserted text is colored and underlined. You have Track Changes enabled. Turn it off and accept all the changes in the document. If the bottom of your document appears to be a long way from the last line of text, display nonprinting characters and you’ll probably see something like Figure 12. Those are those lonely pilcrows that you need to get rid of.
Figure 12. Text with empty paragraphs |
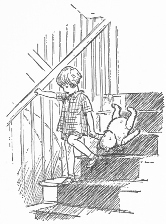 At the beginning of Winnie-the-Pooh, A. A. Milne
writes:
At the beginning of Winnie-the-Pooh, A. A. Milne
writes: